Scripting
Since we have 16 subjects and each subject has 3 runs. In total, we need to repeat all the preprocessing and 1st level analysis in AFNI_GUI 48 times! it is not hard but it is a really tedious job and you could make errors easily. As Joey from Friends said, there’s gotta be a better way, and there is.
Here is the script that makes your life easier!
Creating the Template
To begin with, let’s create a script template for our data. As you have done all the preprocessing of sub-02 from SPM GUI, what we need to do in here is clicking on each preprocessing button of the SPM GUI and add each of the preprocessing modules to our template. Then, just as in the previous tutorials, we’ll fill in the inputs for each preprocessing and statistical modelling portion, and translate what we see from the SPM GUI into Matlab code.
Now, Open the SPM GUI and select Batch from the menu.

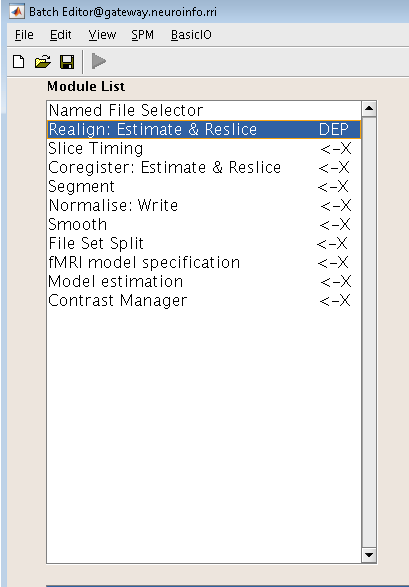
Select the following modules in the order from the SPM at the top menu of the Batch Editor window:
BasicIO -> File/Dir Operations -> File Operations -> Named File Selector
SPM -> Spatial -> Realign -> Estimate & Reslice
SPM -> Temporal -> Slice Timing
SPM -> Spatial -> Coregister: Estimate & Reslice
SPM -> Spatial -> Segment
SPM -> Spatial -> Normalise -> Write
SPM -> Spatial -> Smooth
BasicIO -> File/Dir Operations -> File Operations -> File Set Split
SPM -> Stats -> fMRI Model Specification
SPM -> Stats -> Model Estimation
SPM -> Stats -> Contrast Manager
File Selection and File Splitting
First and foremost, we’ll address the first additional modules that aren’t listed above. Named File Selector module.
The first module requires an input name and sets of files. We will create three file sets, and enter the run-01_bold.nii, run-02_bold.nii and run-03_bold.nii files for each set after you use
gunize to unzip the file. After that, we will deal with the preprocessing modules, Realignment, create three sessions and enter the files for each session respectively.
Preprocessing Modules
Just as we did in the previous chapters, we must now fill in each of the appropriate fields. This is the most time-consuming aspect of the tutorial, but keep in mind that if you don’t script your
analysis, you’ll have to do it manually for each session. In case you may wonder what you are supposed to input for a later preprocessing step if the required data hasn’t been created yet. The Batch
Editor can allow you to use “Dependencies” from earlier steps, indicating that the input should come from the previous step’s output step. If you click the Dependency button in the Realign module for
the first Session, for example, you can pick the option “Named File Selector: run1run2run3files(1),” Once you’ve filled it in, it should look like this: Realign module

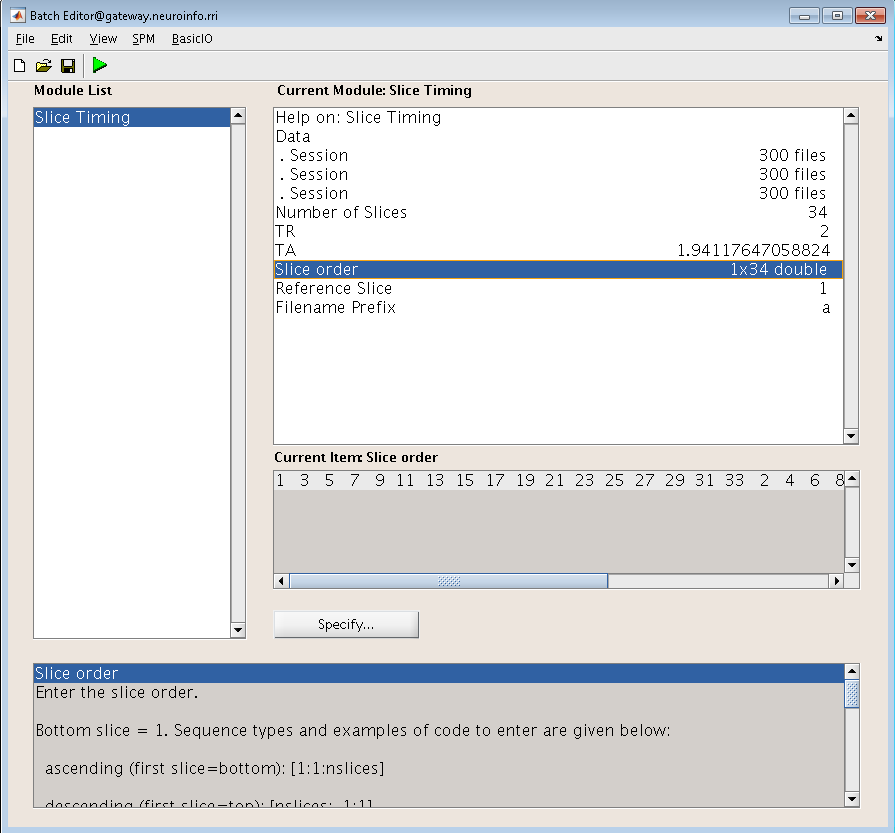
And the same with Slice Timing module,
keep continue with the coregister module, we can use Reference Image with the mean functional image generated during Realignment:

Followed by “Segmentation module”, which we need to change a few parameters such as volums.``save Bias Corrected`` and Deformation Fields

The Normalise preprocessing step requires both the Forward Deformation fields from Segmentation, as well as both the Slice Timing outputs from Sessions 1, 2 and 3
Normalise module

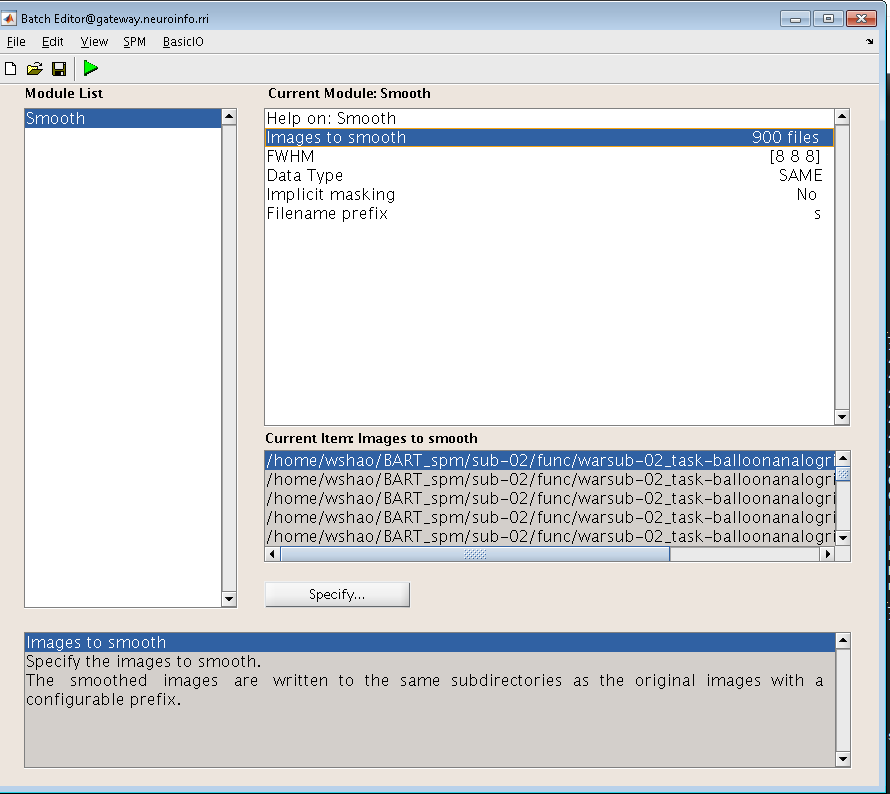
The Smooth module will use the images generated by Normalization
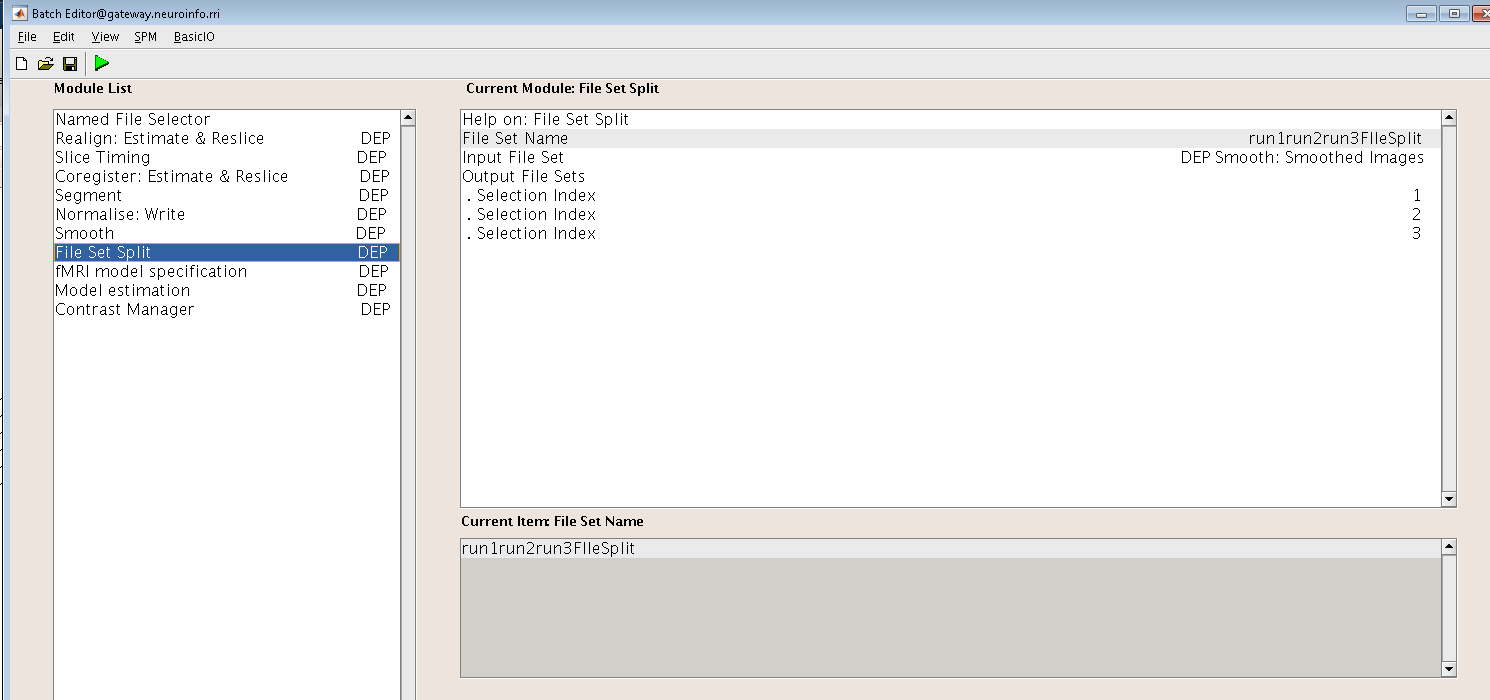
label the File Set Name as run1run2run3FileSplit (this name is simply a label for reference). The Input File Set is the smoothed images from the Smoothing module, and as with the Named File Selector
module, we create two Output File Sets. The Selection Index for the first one is 1, and the Selection Index for the second one is 2. and The Selection Index for the third one is 3, This directs the
module to split the smoothed images into three separate sets, based on how they were labeled by the previous Named File Selector module.
File Set Split module
Model Specification module probably is the most tedious module, it will use the images created during Smoothing, and you also need fill the name, onset time, and Durations as well.
fMRI model specification

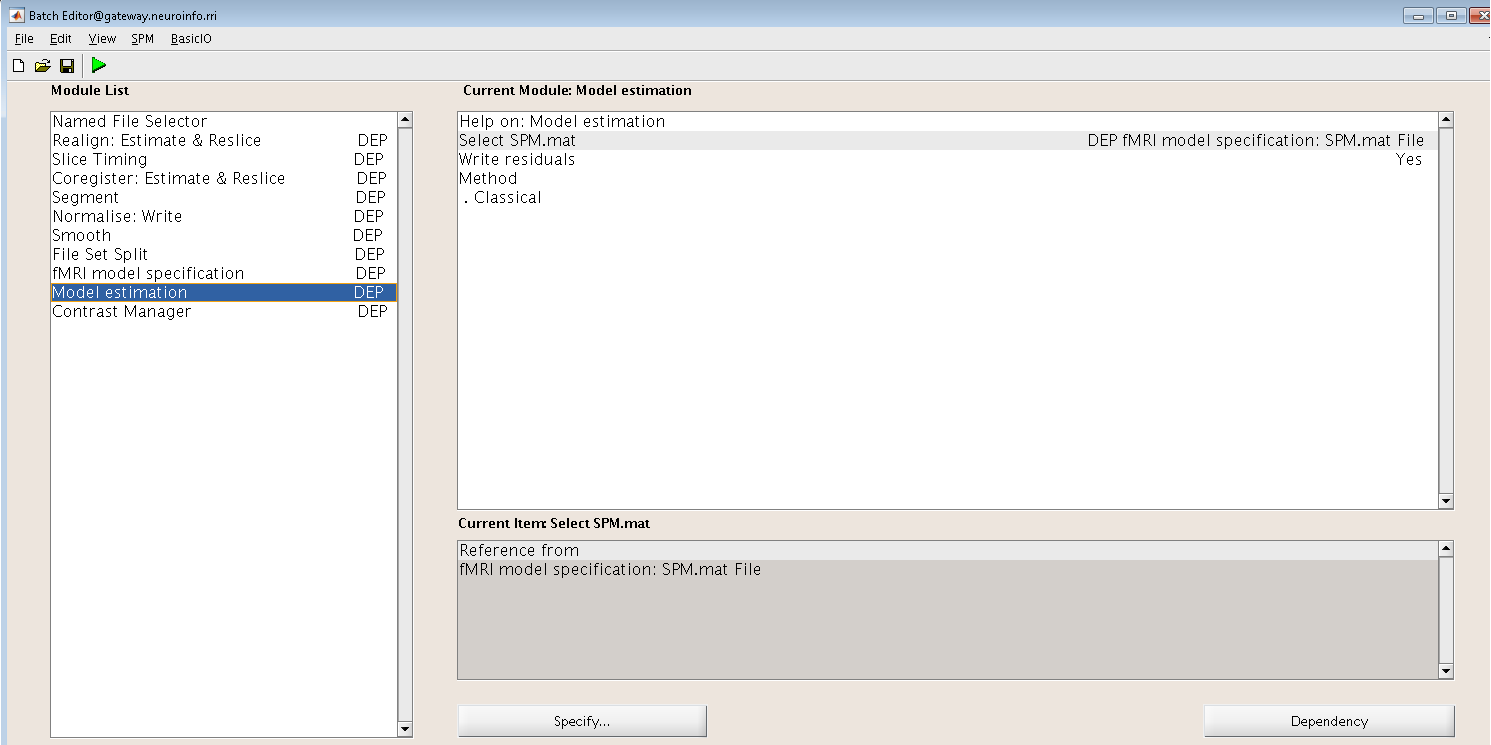
The Model Estimation module analyzes the data output from Model Specification:
Model estimation
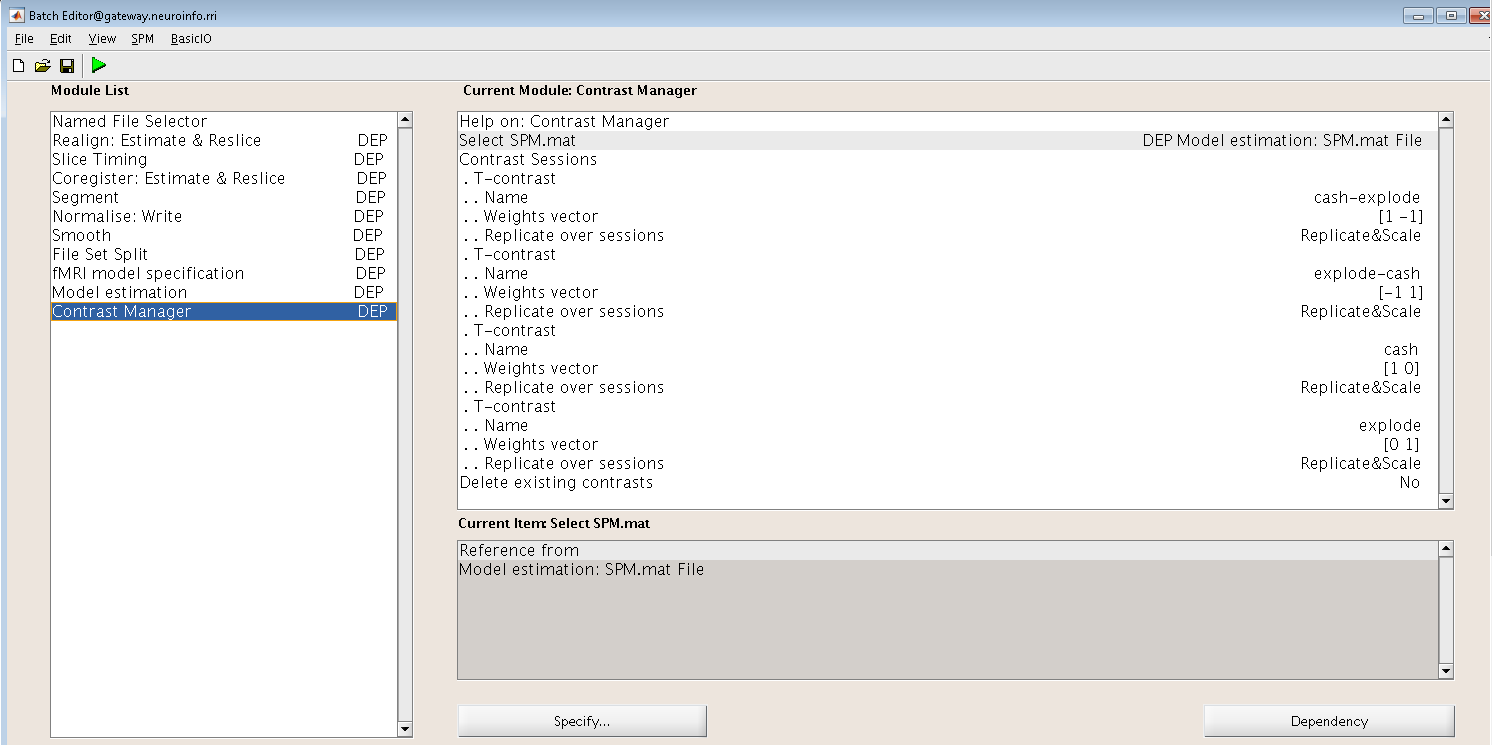
Lastly, the contrast manager will load the SPM.mat file created by the Model Estimation module, For the contrast module, we select the “Replicate&Scale” option. This will replicate the contrast
weights across all of the sessions for that subject, and scale them in inverse proportion to the number of sessions.
Contrast Manager
Editing the Matlab file
The Batch module we have just created is specific to sub-03 so that we have used sub-03’s images and timing files, and the results will only apply to sub-03. we can click the gree Go button to run
and test the script. More importantly, after a few adjustments, we can adapt this script to all of the rest subjects in this study.
First of all, we need to save the modules into a Matlab script. Click on File -> Save Batch and Script, and label the file BART_runprproc. Save it to the BART directory that contains all of your subjects. This will create a Matlab script file that you can open in the Matlab window.
Open the Matlab terminal, navigate to the BART directory which contains the BART_runprproc.m script, Open it by type open BART_runproc.m from the matlab terminal. We will need to make the following edits:
1 Replace the subject number “03” with a variable containing a different subject number on each instance of a for-loop;
2 Replace the username (“wshao”) with a variable pointing to the username of whichever machine name is currently being used by you.
3 change the input directory accordingly to fit in your machine
These three changes will allow us to place the existing code in a for-loop which will run over a set of numbers indicating each subject in the study.
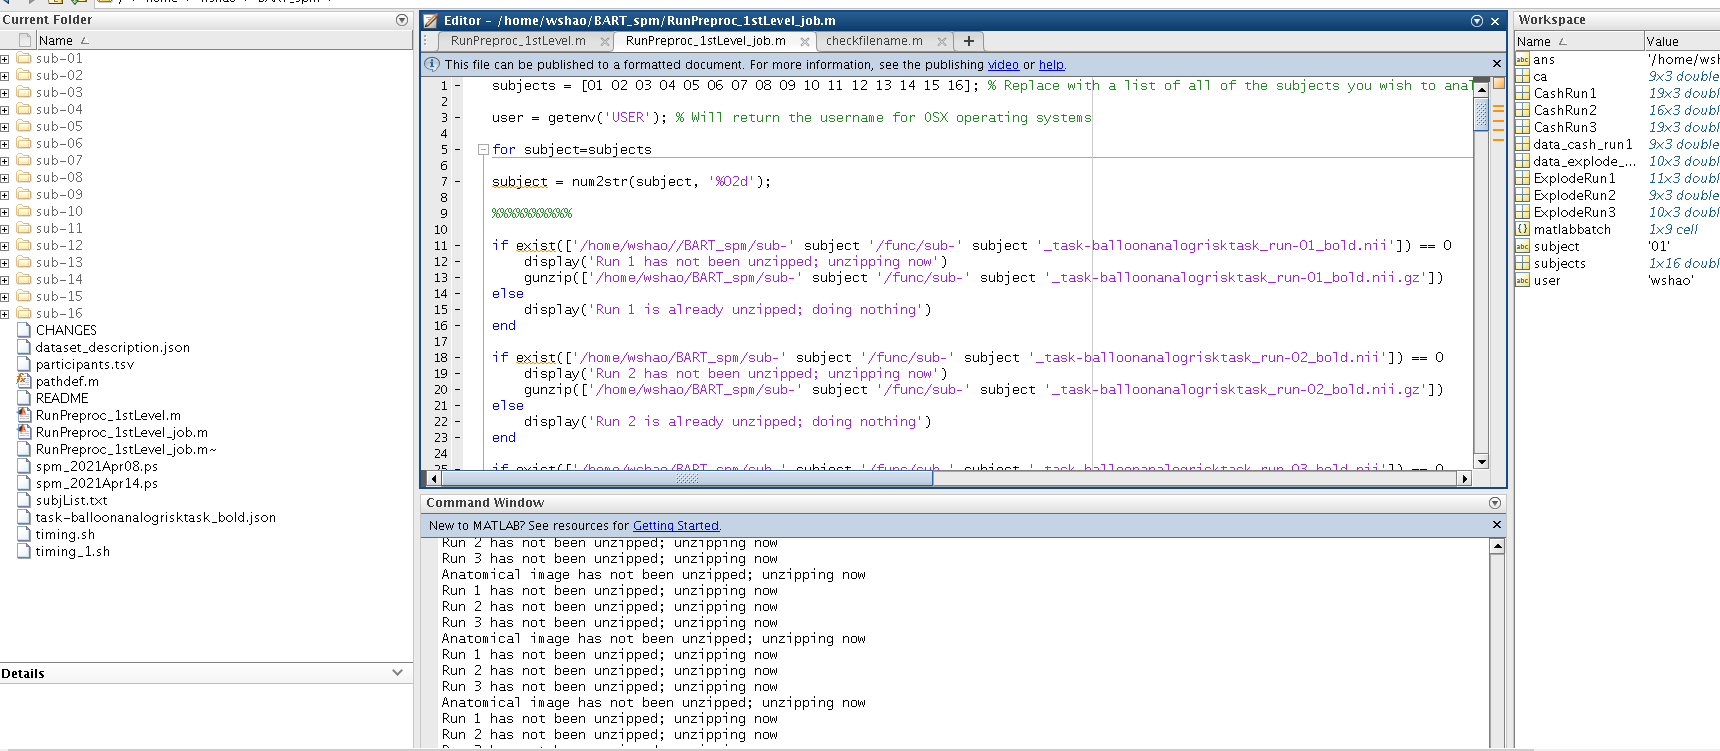
At the beginning of the script, type the following code:
subjects = [01 02 03 04 05 06 07 08 09 10 11 12 13 14 15 16]; % Replace with a list of all of the subjects you wish to analyze

user = getenv('USER'); % Will return the username for OSX operating systems

for subject=subjects

subject = num2str(subject, '%02d');

if exist(['/home/wshao//BART_spm/sub-' subject '/func/sub-' subject '_task-balloonanalogrisktask_run-01_bold.nii']) == 0
    display('Run 1 has not been unzipped; unzipping now')
    gunzip(['/home/wshao/BART_spm/sub-' subject '/func/sub-' subject '_task-balloonanalogrisktask_run-01_bold.nii.gz'])
else
    display('Run 1 is already unzipped; doing nothing')
end

if exist(['/home/wshao/BART_spm/sub-' subject '/func/sub-' subject '_task-balloonanalogrisktask_run-02_bold.nii']) == 0
    display('Run 2 has not been unzipped; unzipping now')
    gunzip(['/home/wshao/BART_spm/sub-' subject '/func/sub-' subject '_task-balloonanalogrisktask_run-02_bold.nii.gz'])
else
    display('Run 2 is already unzipped; doing nothing')
end

if exist(['/home/wshao/BART_spm/sub-' subject '/func/sub-' subject '_task-balloonanalogrisktask_run-03_bold.nii']) == 0
    display('Run 3 has not been unzipped; unzipping now')
    gunzip(['/home/wshao/BART_spm/sub-' subject '/func/sub-' subject '_task-balloonanalogrisktask_run-03_bold.nii.gz'])
else
  display('Run 3 is already unzipped; doing nothing')
end

if exist(['/home/wshao/BART_spm/sub-' subject '/anat/sub-' subject '_T1w.nii']) == 0
    display('Anatomical image has not been unzipped; unzipping now')
    gunzip(['/home/wshao/BART_spm/sub-' subject '/anat/sub-' subject '_T1w.nii.gz'])
else
    display('Anatomical image is already unzipped; doing nothing')
end
you need to change the directory /home/wshao/BART_spm to your subject directory, you can cd to the subject directory and type pwd to know the working directory
The above code does the following:
the variable user takes the value returned from the command getenv(‘USER’). This should return the username of the current user of the computer - in the current example, “ajahn”.
We then begin a for-loop that is initialized with the code for subject=subjects. This means that a new variable, “subject”, will assume the value of each consecutive entry in the array “subjects”. In other words, the first instance of the loop will assign the value “01” to subject; on the second instance, it will assign the value “02”, and so on, until the loop reaches the end of the array.
Since an array will strip any leading zeros, and since we need to convert the numbers in our array to a string, the “subject” variable is converted using the num2str command. The text ‘%02d’ is string-formatting code indicating that the current value being converted from a number to a string should be zero-paddded with as many zeros as needed until the number is two characters long.
The conditional statements look for whether the unzipped functional and anatomical files exist, and if they don’t, the files are unzipped using Matlab’s gunzip command.
Concatenating strings
Throughout the rest of the code that was generated when we saved the Batch module as a Matlab script, we will need to replace each instance of 03 with the string subject, and each instance of wshao (or whatever your username is) with the variable user that was defined above. This can be done using search and replace.
In the example code above, we used brackets to horizontally concatenate strings with variables. A line of code like the following:
[‘/home/wshao/BART_spm/sub-’ subject ‘/anat/sub-’ subject ‘_T1w.nii’]
will concatenate the strings surrounded by single apostrophes with the variables. If the variable “subject” contains the value “03”, then the above code would expand to the following:
‘/home/wshao/BART_spm/sub-03/anat/sub-03_T1w.nii’
You will need to perform these substitutions for the rest of the script, taking care to use single apostrophes to set off the strings from the variables. Brackets will be required for this concatenation, even within the cells denoted by curly braces. (Cells are arrays that can contain several different data types, such as strings and numbers.)
Loading the Onset Files
The last part of the script we have to edit is the onset times. In this experiment, each subject had different onset times for each condition. If the timing files have already been converted to a different format, then you can create a variable that contains the timing information and insert it into the “onset” field for the stats module. For example, the following code found around line 134 of the Matlab script can be changed from this, which contains onset times specific to sub-03:
matlabbatch{9}.spm.stats.fmri_spec.sess(1).cond(1).onset = [55.013
                                                            78.631
                                                            96.264
                                                            109.377
                                                            209.904
                                                            247.183
                                                            253.506
                                                            272.949
                                                            289.177
                                                            296.349
                                                            305.967
                                                            325.969
                                                            429.214
                                                            476.099
                                                            525.129
                                                            535.041
                                                            556.235
                                                            572.240];
To change like this:
data_cash_run1 = load(['/home/wshao/BART_spm/sub-' subject '/func/cash_run1.txt']);

matlabbatch{9}.spm.stats.fmri_spec.sess(1).cond(1).onset = data_cash_run1(:,1);
In which the variable data_cash_run1 stores the onset times for the subject in the current loop, and then enters those numbers into the onset field. Note that the code (:,1) indicates that only the first column of the variable should be read, which contains the onset times. What’s more, you need to do this 6 times, the cash and explode 3 times each.
Running the Script
When you have finished editing the script, save it and return to the Matlab terminal. You can then execute the script by typing:
BART_runprproc
You will then see windows pop up as each preprocessing and statistical module is run, similar to what you would see if you executed each module manually through the GUI.
Next Steps
The script will take a while(depends on the performance of the machine) to run for all the 16 subjects, When you are finished, we will examine the output.
you can find a copy of this full script from github page here.